
TL;DR – in short
- In 2026, the winners are hacks that do two things: organize and pretend to be custom-built .
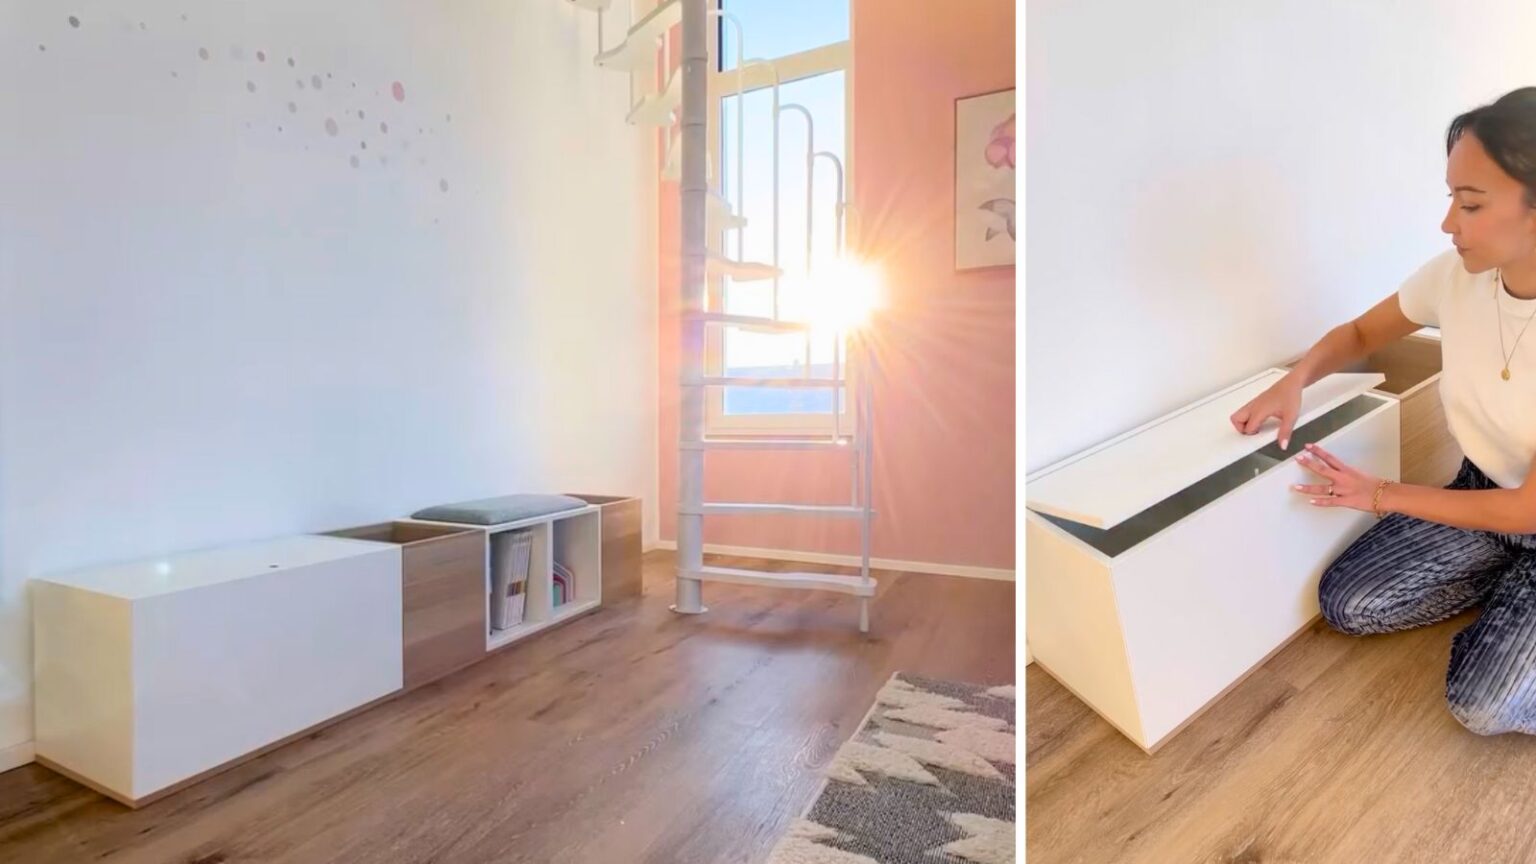
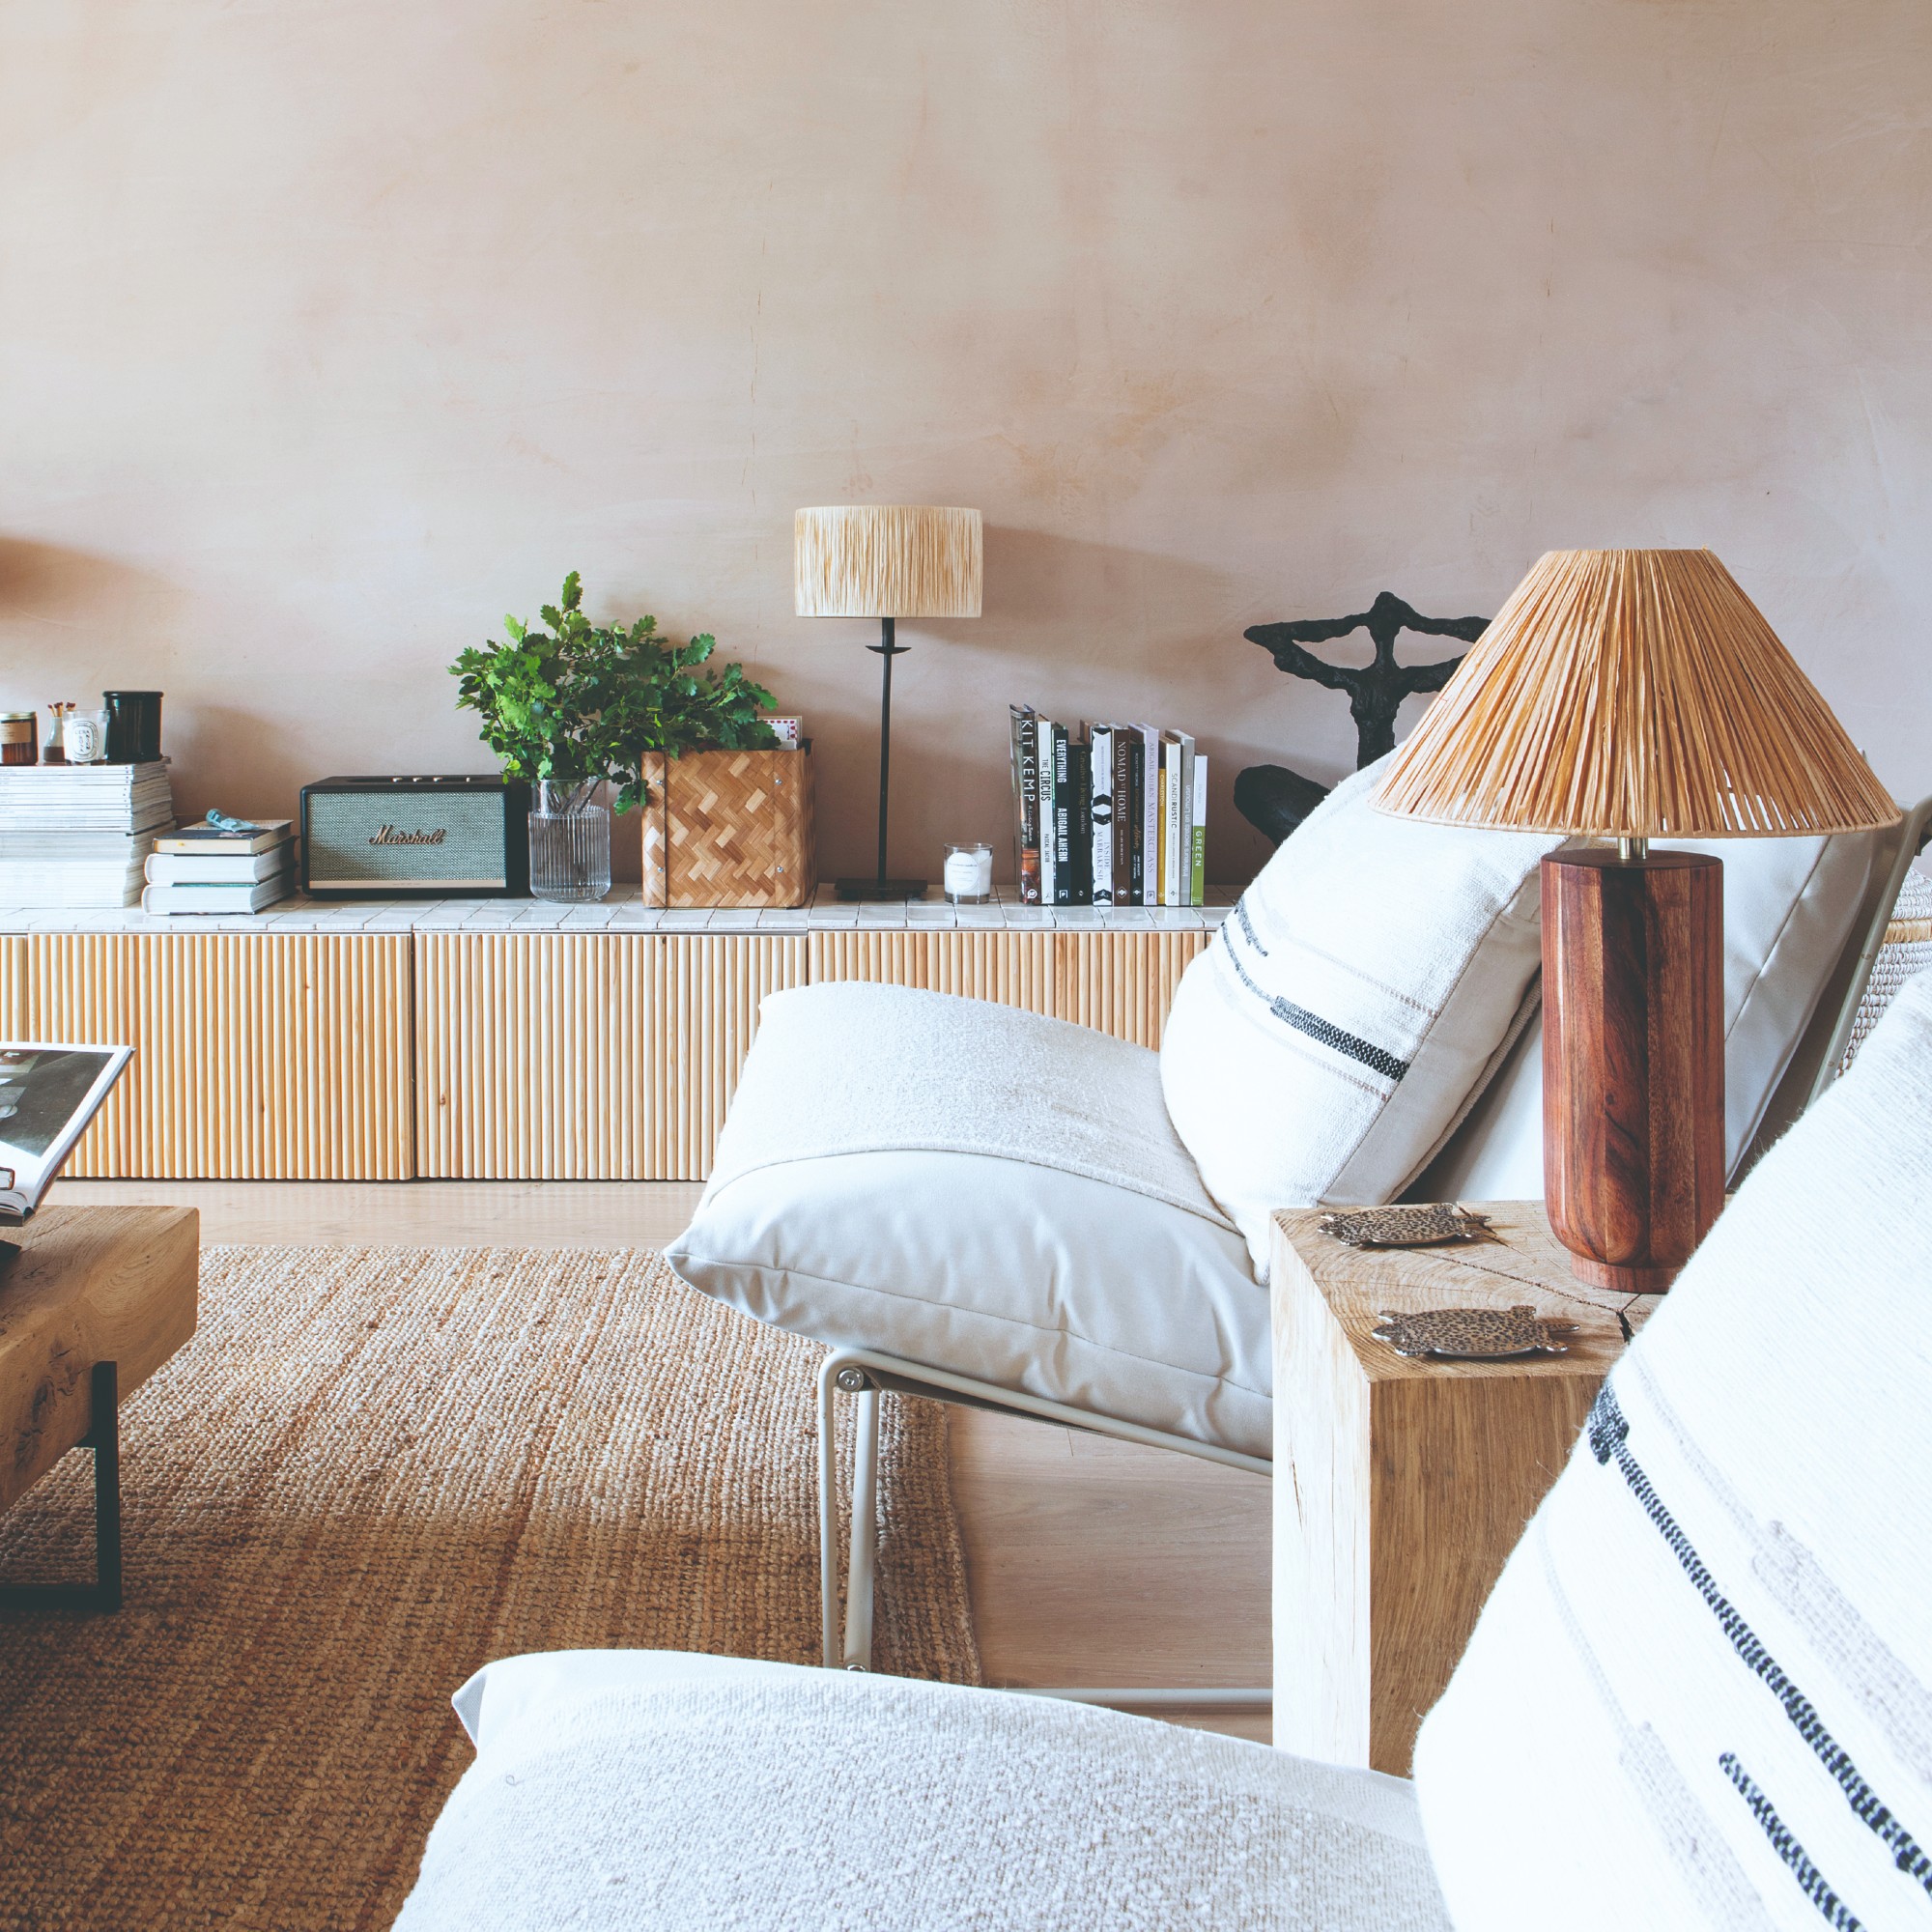
- The most “trendy” are: coffee in one place , hidden cables , modular cabinets and low furniture-chests .
- If you have kids, a dog, a cleaning robot, and a life: stability and anchoring are priorities.
- You don't have to be a carpenter. You just have to be a stubborn person with a tape measure.
This post is about 5 hacks that I think will do the most work in 2026 because they solve real problems, not just "look pretty on Pinterest."
What does a “good IKEA hack” mean in 2026?
A good hack is one that still makes you happy after a month, and doesn't remind you of the mistake you made at 9:30 PM on Sunday.
- It has a function: hides clutter, manages cables, provides additional space.
- It has a finish: strip, cover, even gaps, sensible color.
- It has security: nothing wobbles and asks for disaster.
1) Coffee nook on an IKEA HAAGAN countertop (the simplest "premium effect")
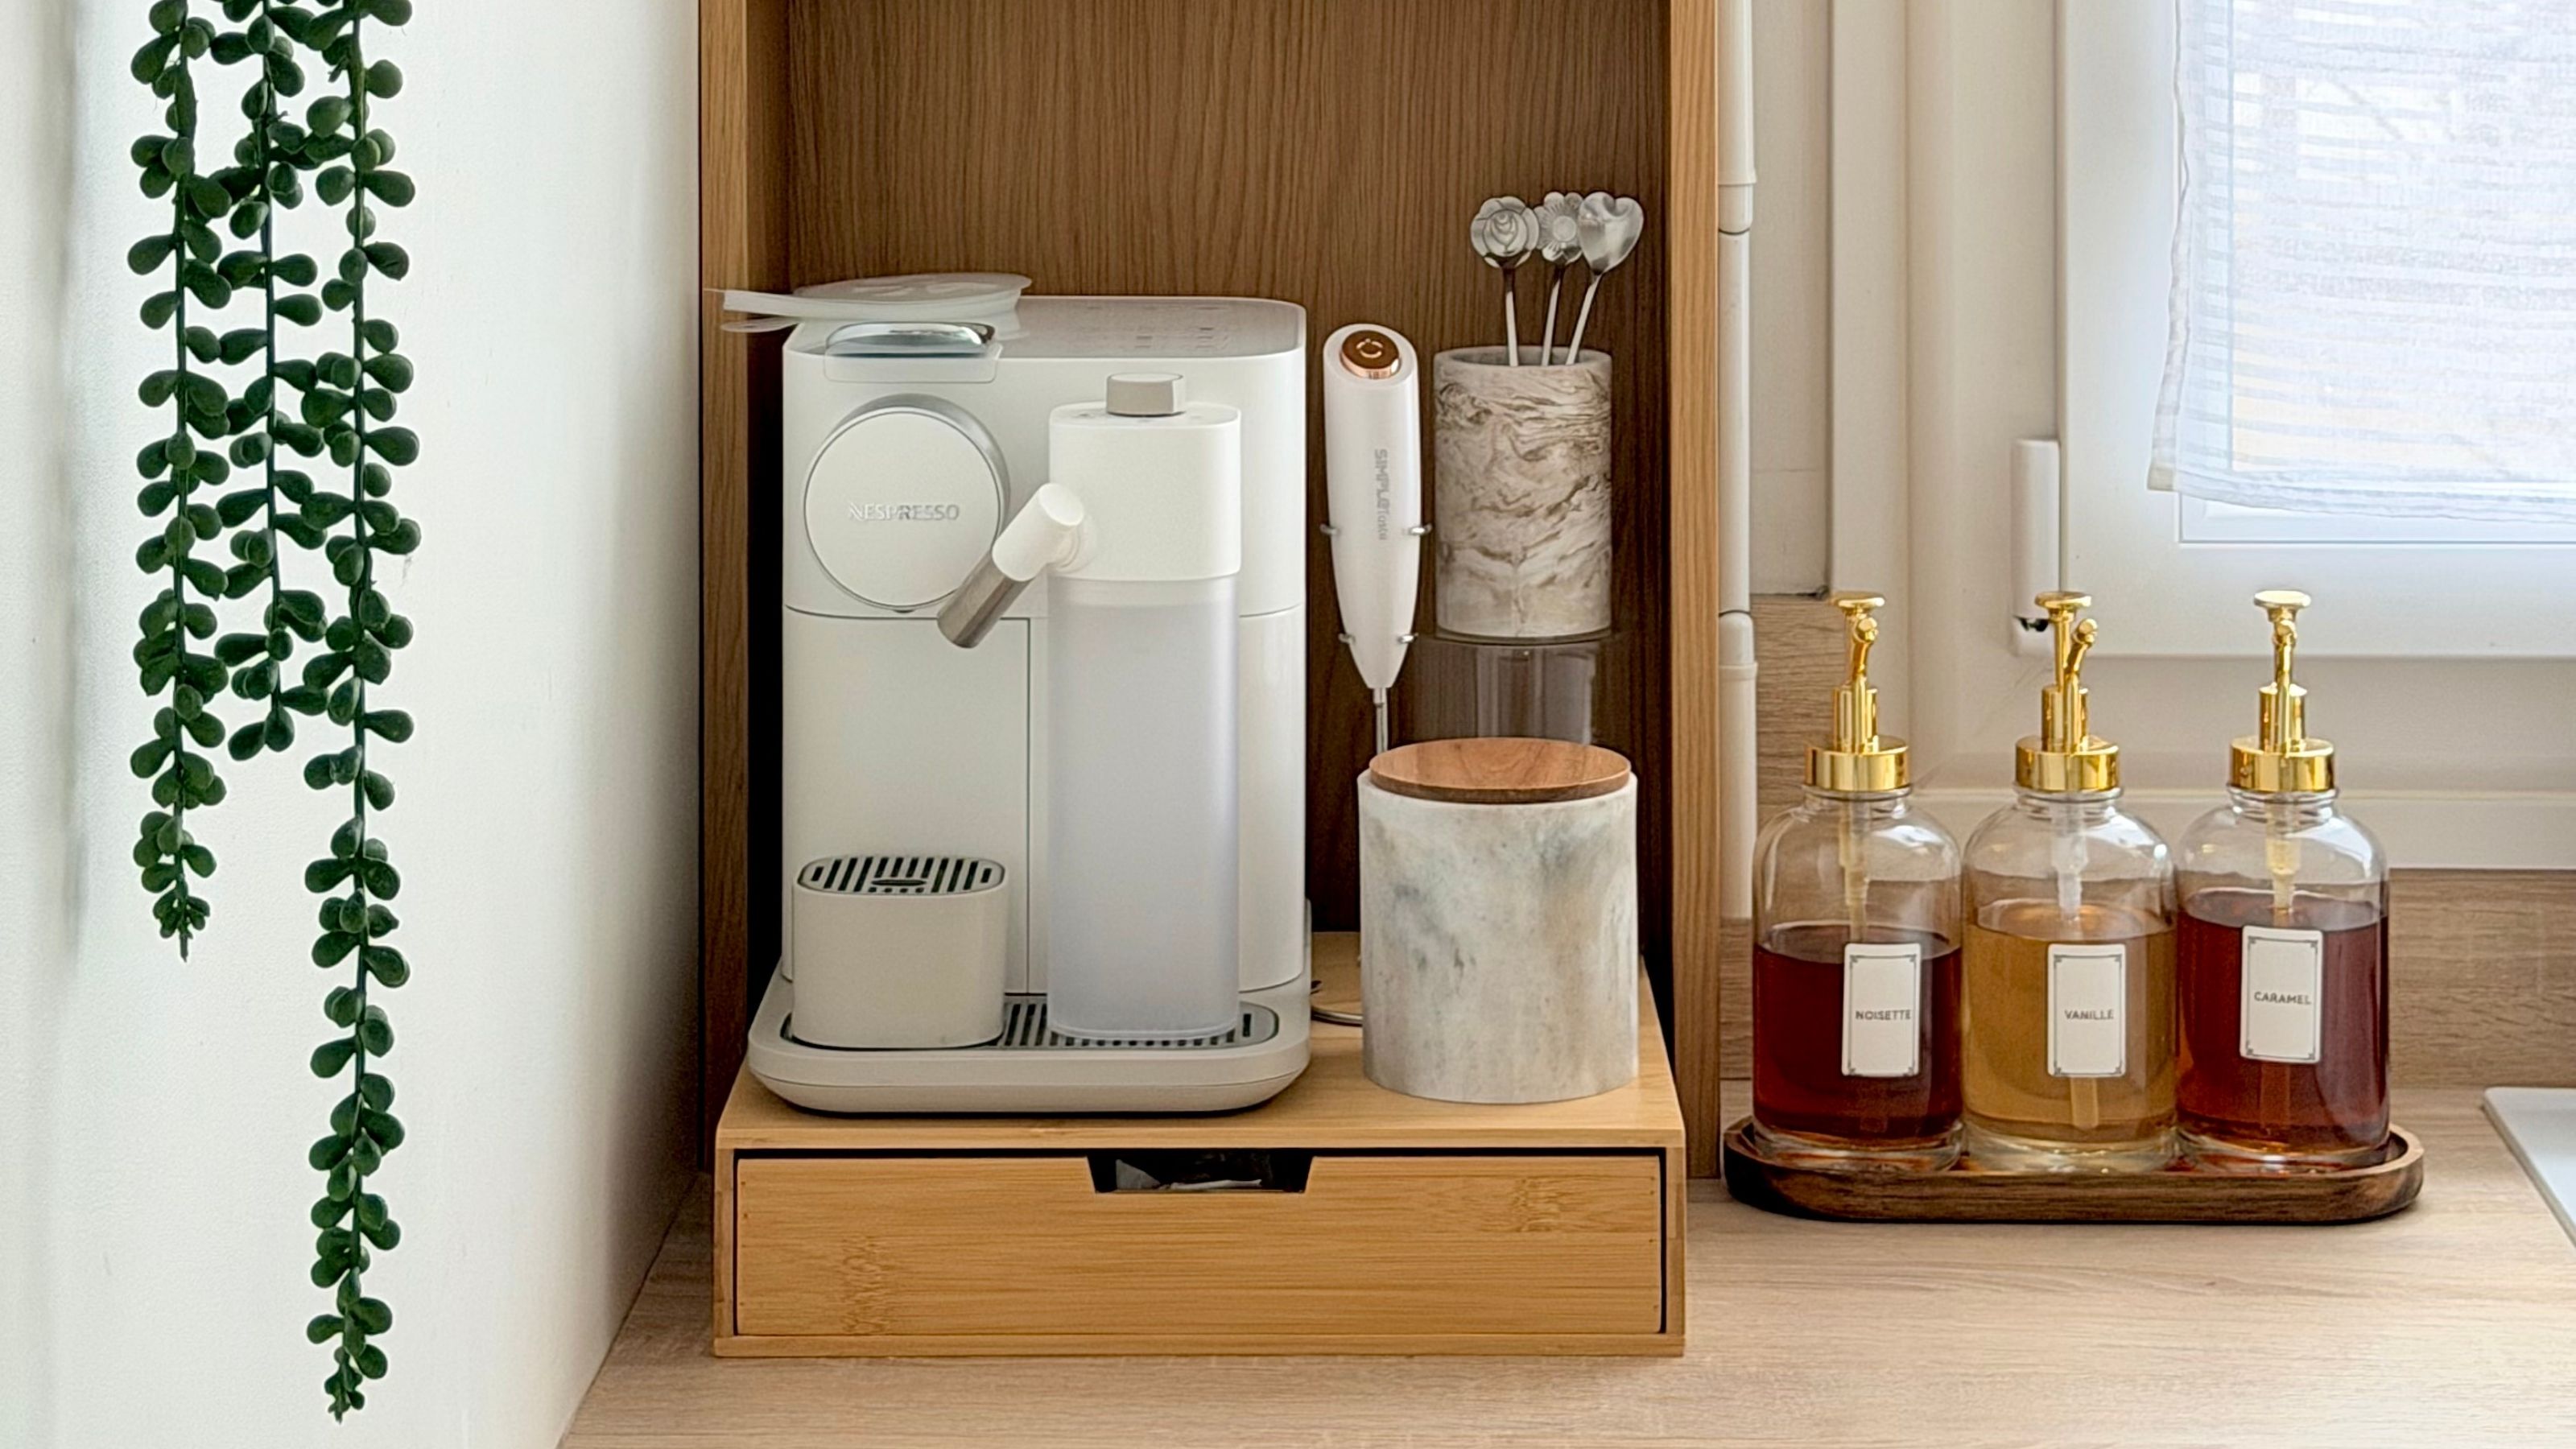
Why it's "2026": Because people are tired of grinders, syrups, and cables lying around. Everything has its place here, and the counter doesn't look like the back of a coffee shop.
What's the hack: You use a HAAGAN shelf as a "cabinet" for your coffee machine. Basically, you leave the bottom piece (so the coffee machine fits), make a small hole for the cable, and style the shelves. :contentReference[oaicite:1]{index=1}
Level: easy
Time: 1–2 hours
Budget: low (mainly shelf cost + bits and pieces)
What you need:
- IKEA HAAGAN shelf (or similar in size)
- a knife to make a hole for the cable
- double-sided tape / cable organizer
- optional: peel and stick sticker for the back + small LED strip
How to do it:
- Adjust the shelf and check if the coffee machine is easy to operate.
- Do not install the lower element if it interferes with inserting the coffee machine.
- Make a small hole in the back plate for the cable (at the bottom, near the socket).
- Hide the power strip at the back and secure the cables with cable ties.
- Arrange mugs and accessories. It looks best with 2-3 items per shelf, not 12.
What I need to pay attention to: ventilation of the coffee machine (do not press it “all the way in”) and protection against water (a mat under the coffee machine makes a difference).
2) Hidden charging station made of strips (no more “cable sockets”)
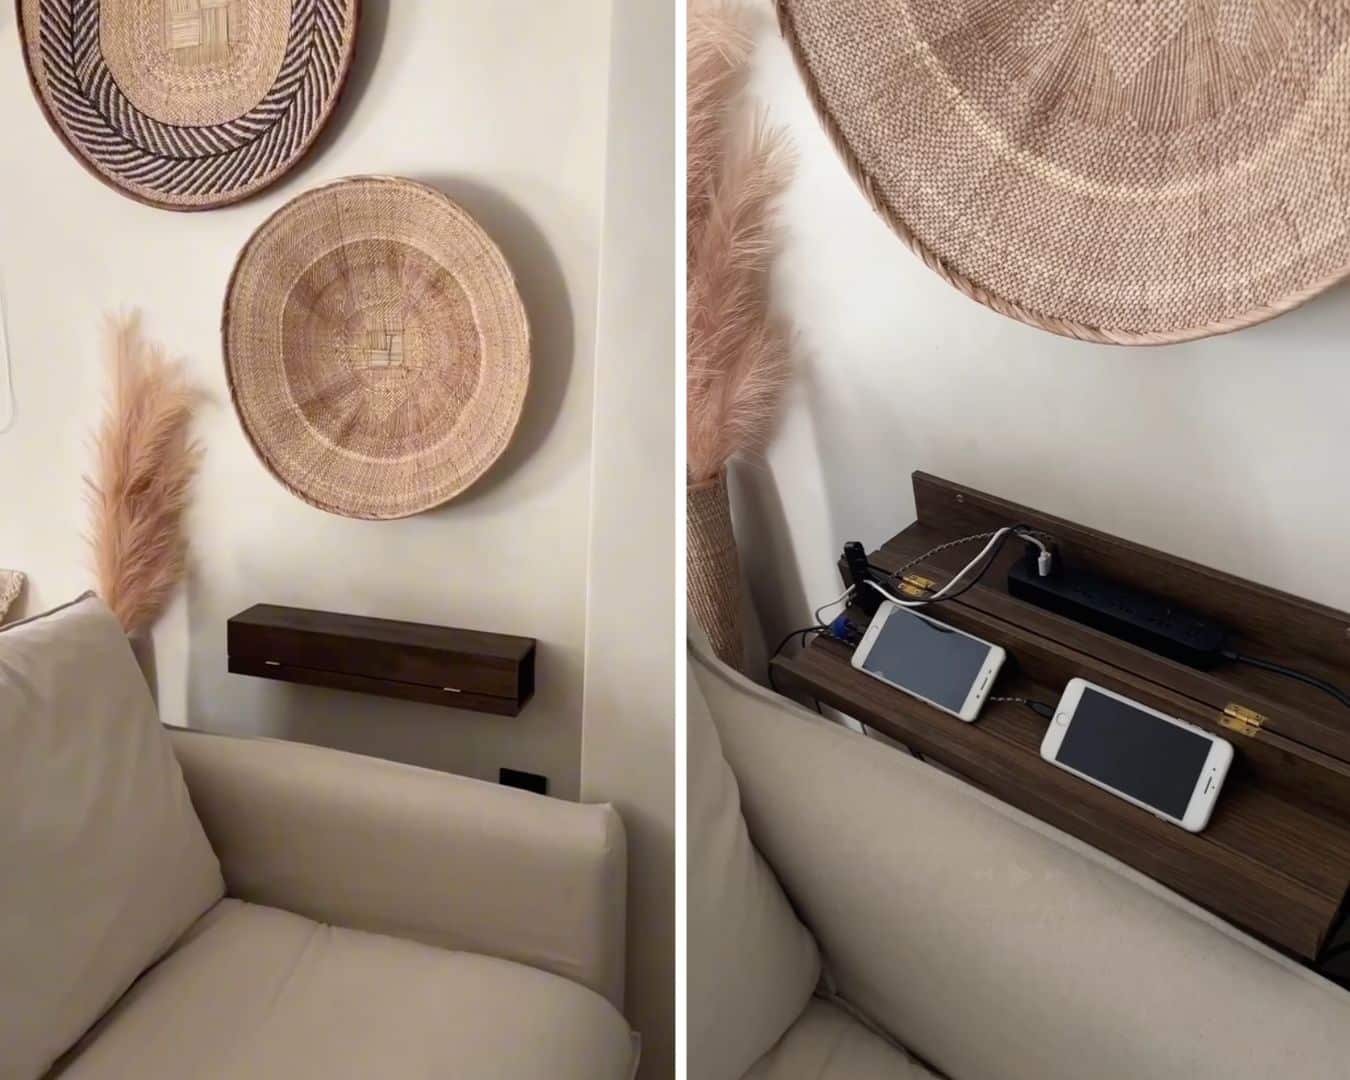
Why it's "2026": Because we have more cables than socks. This hack cleans up without a major overhaul.
Inspiration: IKEA Hackers describes this as a clever, hidden charging station that eliminates visual clutter on your countertop. :contentReference[oaicite:2]{index=2}
Level: easy/medium
Time: 1–3 hours
Budget: low
What you need:
- tile/stripe as a “cover” (e.g. picture shelf)
- power strip (preferably flat)
- cable ties, cable holders
- drill/hole saw (if you are making a pass through the countertop or back of a cabinet)
How to do it:
- Plan the space: countertop in the kitchen, chest of drawers in the living room, bedside table.
- Mount the power strip so that it is invisible (e.g. under a shelf).
- Route the cables through one “channel” and secure them with cable ties.
- Create a pass-through for one power cable. The rest should be hidden.
- Test: Connect 2-3 devices at once and see if anything is overheating.
What I need to watch out for: don't cram power supplies into an enclosed space without air. Safety > aesthetics.
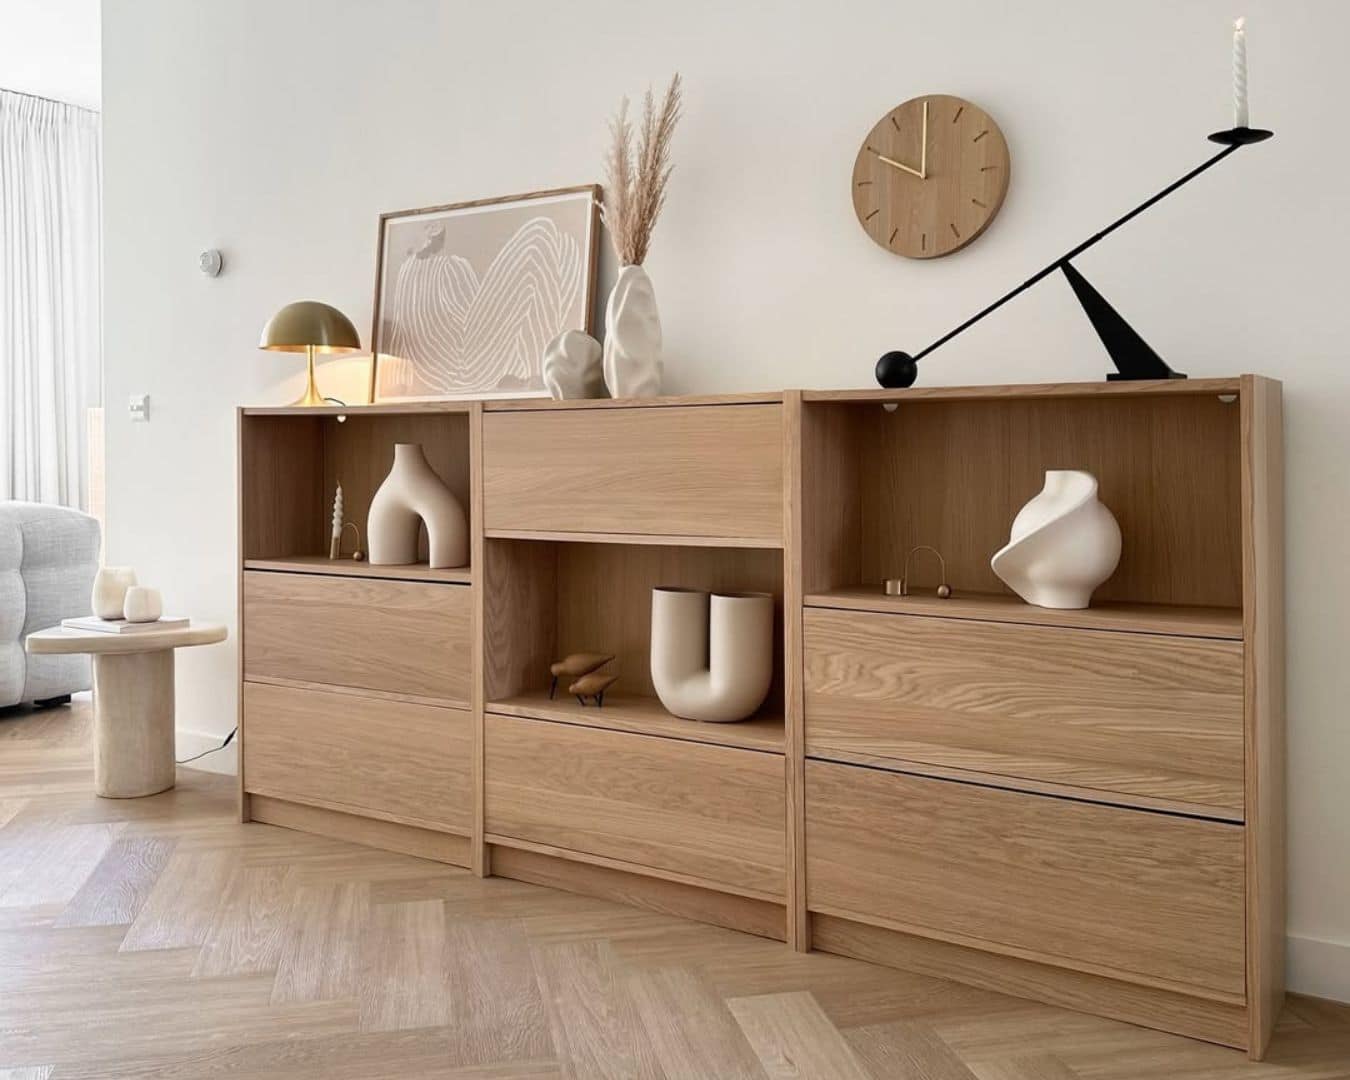
3) EKET as "expensive" modular storage (not "store-bricks")
Why it's "2026": Because the modules are coming back, only in a more "pure" and refined version. EKET offers this without paying the "design tax."
Inspiration: IKEA Hackers shows that simply a different arrangement of cubes (vertically/sideways) can create a "made-to-measure" effect. :contentReference[oaicite:3]{index=3}
Level: medium
Time: 2–5 hours
Budget: medium (depends on the number of modules)
What you need:
- EKET modules
- connectors/angles for reinforcement
- legs or base (optional)
- wall anchors if the structure is high
How to do it:
- Draw the layout on the floor: length, height, what should be closed, what should be open.
- Assemble the modules and connect them together (don't rely on gravity).
- Add one “premium” detail: legs, strip, color, handles.
- If it is a high-rise building, anchoring to the wall is mandatory.
What I need to be careful of: with children and pets, high structures must be anchored. There's no arguing with that.
4) BILLY as a low chest of drawers with flaps (i.e.: BILLY, but "adult")
Why it's "2026": Because home office and "put it away quickly" are still real problems. Flaps get organized in 3 seconds.
Inspiration: IKEA Hackers describes the BILLY flap dresser conversion as a way to achieve more polished storage. :contentReference[oaicite:4]{index=4}
Level: medium
Time: 1 day
Budget: medium
What you need:
- BILLY (or similar body)
- fronts/flaps + hinges/actuators (depending on the design)
- screws, angle brackets, and optional masking strips
How to do it:
- Plan which shelves should be open and which should be closed.
- Select hinges according to the weight of the fronts.
- Reinforce the body with angle brackets if it is to stand low and bear weight.
- Finish edges and crevices. This is where you create a "furniture," not a "design."
What I need to watch out for: straight fronts. If the flaps are "leaky," the whole thing looks cheap, even if it wasn't.
5) KALLAX as a sideboard (it seems simple, but the effect is amazing)
Why it's "2026": because low, long chests of drawers are back and they don't want to go away. And KALLAX is a great base for such a piece.
Inspiration: Ideal Home cites the KALLAX sideboard conversion as one of the more sensible "living room hacks" (including adding doors and legs). :contentReference[oaicite:5]{index=5}
Level: easy/medium
Time: 3–6 hours
Budget: low/medium (depends on legs and fronts)
What you need:
- KALLAX (the "horizontal" version often works best)
- DIY doors/cube inserts or fronts
- legs (optional, but they make a "piece of furniture")
- wall mounting (if it is placed in a place where someone can step on it)
How to do it:
- Place the KALLAX in the desired location and check the level.
- Add fronts or inserts to the cubes (best to keep it repeatable).
- Add legs or create a low base with a strip. This will avoid a "block on the ground."
- If there are children in the house, anchoring to the wall is your insurance against drama.
What I need to watch out for: cheap legs + heavy furniture = wobble. If it's going to look good, it has to stand well.
What do I need to watch out for? (short and brutal)
- Anchoring: Always high things. With kids, a dog, and a life on the go, this is a must.
- Finishing touches: moldings, fascia, even gaps. This is the difference between "DIY" and "wow."
- Load: Select guides, hinges and flaps based on weight, not promotion.
- Water and steam: kitchens and bathrooms are less forgiving. Protect edges.
Practical conclusions
- Want the fastest, most premium effect? Get a coffee nook or hidden loading .
- Want the most storage for your buck? EKET and KALLAX .
- Want "carpenter-style furniture," but without the carpenter? BILLY with flaps .
If I had to choose one hack to start with: hidden charging. Because this is the first time in my life that a cable no longer wins over a human.
FAQ – frequently asked questions
What's the easiest IKEA hack to do in 2026 without tools?
A coffee station from HAAGAN and simple “cable organizers” can be made with a minimal set of tools, often without drilling (apart from a small hole for the cable).
Do IKEA hacks make sense in a rental apartment?
Yes, if you choose freestanding designs or those that require only a single mounting point. The less interference with your walls, the better your sleep.
How to make a hack look like custom-made furniture?
Three things: legs or a base, finishing the gaps with a strip, and a consistent color (e.g. all in one shade).
Is anchoring to the wall really necessary?
If the piece of furniture is tall, heavy, or has the potential to become a "climbing wall," then yes. It's the cheapest option that saves your health and your nerves.
What is more “current” in 2026: fronts or organization?
Both, but organization wins. Pretty fronts won't help if the countertop is cluttered with cables, grinders, and everything else.


0 comments